Barista has a built-in feature allowing content editors to restrict viewing access on any type of content and it's extremely easy to use. You will have two options with access control.
Anyone with a VUNetID
The first level of access control is restricting viewing to anyone with a VUNetID. This means exactly that. Anyone with a VUNetID can log in and view the content on your restricted page.
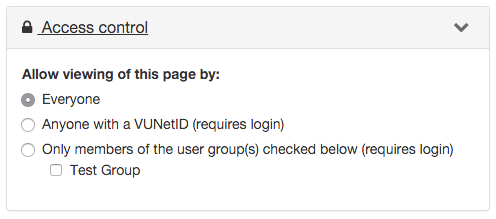
To implement this feature, edit the page you want to put behind VUNetID and expand the Access Control box to the right.

By default, Everyone is selected. This means your page is public. Change the access control to Anyone with a VUNetID and then save your page. Now, when someone visits this page on your site, they'll see the login below. They can view the contents on the page by logging in with their VUNetID.

If this page is in your navigation menu, a lock icon will show next to the page title, signaling that a login is required.
![]()
Specific VUNetIDs
You may want to restrict access to pages on your site even further. Perhaps you don't want everyone with a VUNetID to access your content, but only specific people with VUNetIDs. This is easy to do in Barista, but has a few more steps than the previous option.
The first step is to create a group. This group will contain the VUNetIDs of the specific people you want to be able to access your content.
Creating a Group
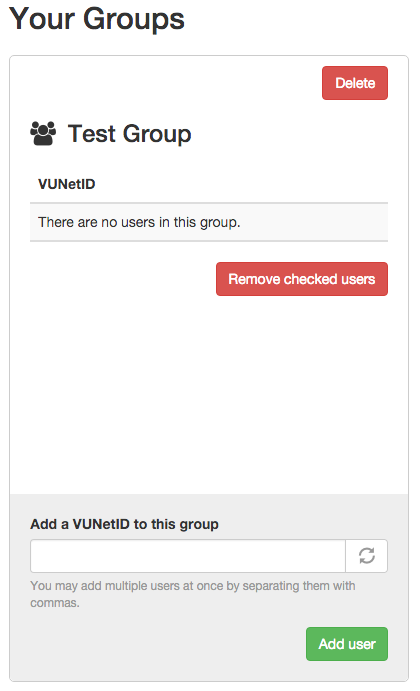
To create a group, go to the Users section in the top black admin bar. Scroll down to the Your Groups section. Enter a name for your group and select the green "Create new group" button. You will not be able to edit the name later, but you can delete a group. For this example, our group name is Test Group.

Next add the specific VUNetIDs of those that belong in the group and select the green “Add user” button. You can remove members from a group by checking the box to the left of the VUNetID you want to remove and select the red “Remove checked users” button.
Deleting a Group
To delete a group, select the red “Delete” button in the top right corner of the group area.
Assigning a Group to a Page
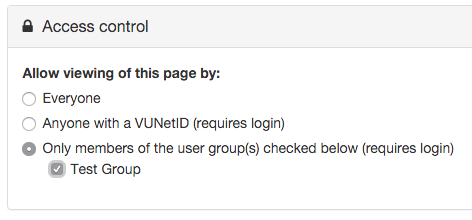
To use the Group feature, create a page or edit an existing page on your site. Expand the Access Control area in the right sidebar. Select the “Only members of the user group(s) checked below” option, then check the box next to the user group. The group you created should show here. This will lock down the page to only allow those in the user group to view it. Content Editors will always be able to view any page on the site and do not need to be added to the user group(s).
